Transitioning from Traditional to Digital: A Beginner’s Guide
November 16, 20256 min readBig Red Illustration
First time going digital? Start simple. Focus on line control and comfortable posture before diving into advanced brushes. The goal is to make digital feel as natural as pen and paper.
What to Expect
Digital drawing feels different at first—surface texture, response, and parallax may take a week or two to get used to. Stick with it and build new muscle memory.
Beginner Steps
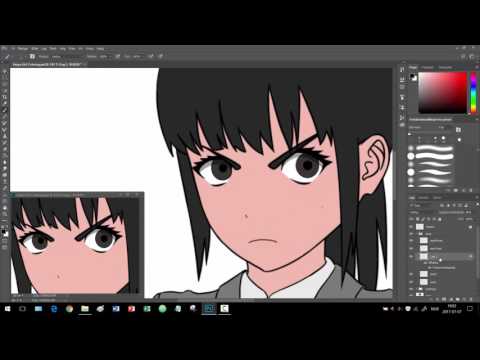
Pick Your Tool: Screenless tablet for budget; pen display for direct-on-screen drawing.
Practice Lines: Draw ellipses, boxes, and long confident strokes daily.
Limit Brushes: Use 2–3 brushes at first—one pencil, one ink, one texture.
Video: Getting Started in Digital Art as a Traditional Artist
Recommended Gear
Choose a size and surface that suits your hand movement. Our guide rounds up reliable, artist-tested options: Best Digital Boards.
A 14‑Day Practice Plan
Short, consistent sessions beat marathon studies. Here’s a simple two‑week routine that eases you into digital while building confidence.
Days 1–3: Lines and ellipses. Practice long strokes using your shoulder; reduce pen pressure threshold in your driver for lighter activation.
Days 4–6: Value studies with one soft round brush. Focus on edges—hard vs soft—without switching tools.
Days 7–9: Inking drills. Use a stabilized inker. Trace your own sketches at different zoom levels to find a comfortable hand speed.
Days 10–12: Flats and simple shading on a small character or object. Separate INK / FLATS / SHADOWS into clean groups.
Days 13–14: Add texture with a paper grain overlay and a subtle noise layer. Export web and print versions.
When your routine clicks, you’ll feel the pen and canvas “disappear.” If your tablet feels too small or too slick, look through our curated list of drawing tablets to match size and surface texture to your style.
Driver Setup That Actually Helps
Pressure curve: Start with a gentle S‑curve so thin lines trigger without pressing hard.
Button mapping: Map Undo to pen barrel; put Rotate/Zoom on tablet buttons to keep your shoulders relaxed.
Per‑app profiles: Save different settings for inking and painting apps—inkers often prefer higher stabilization with a slightly firmer curve.
Scan paper grain, watercolor bleeds, or charcoal rubbings at 300–600 DPI. Convert to grayscale, set the layer to Multiply/Overlay, and mask where needed. This keeps the hand‑made feel while enjoying digital control. Build a small texture library you reuse across pieces for style consistency.
Color, Canvas, and File Hygiene
Canvas size: Work at 1.5–2× your intended output. It’s easier to shrink cleanly than upscale.
Color: Work sRGB for web; soft‑proof CMYK for print. Keep a palette swatch layer on top for easy sampling.
Layers: Name groups (INK / FLATS / SHADOWS / FX / BG). Use clips and masks to avoid destructive edits.
Exports: Save a layered master (PSD/TIFF) and flattened PNG/JPG for sharing.
When it’s time to scale up, a responsive pen display can reduce friction. See our pen displays and tablets buyer’s guide for pros and cons by size and budget.
Common Beginner Pitfalls
Too many brushes: Limit to 2–3 core brushes until muscle memory forms.
Working zoomed‑in: Zoom out frequently to check silhouette and value read.
Death grip posture: Loosen pen grip; lift the wrist; draw from the elbow/shoulder.
One giant layer: Separate tasks; it saves hours during revisions.
FAQ
Do I need a large tablet?
Not to start. Medium suits most desks and styles. Larger surfaces favor expressive, shoulder‑driven strokes.
Which app is best?
The one you’ll practice in. Procreate, CSP, Photoshop, Krita—each can produce professional results. Choose based on your brushes and features, not trends.
Pen display or screenless tablet?
Displays feel immediate and are great for painting; tablets are affordable and ergonomic. Use our digital boards comparison to pick the right path.
Next Steps
Keep sessions short and focused, build a tiny brush set, and organize your files. As skills grow, your hardware preferences will be obvious. When you’re ready to purchase or upgrade, compare current top picks and choose a size that fits your desk and posture.
Brush Choices that Build Skill (Not Confusion)
Pick one pencil, one inker, and one soft paint brush. Set spacing so strokes feel responsive, save them to a minimal set, and stick with them for two weeks. Skill grows faster when the toolset is stable. Add new brushes slowly and only to solve a specific problem (e.g., a textured foliage brush for backgrounds).
Light & Shadow Mini Studies
Choose a simple object—an apple, a mug, a toy—and paint it with a single soft light. Do three tiny studies: high‑contrast, low‑contrast, and rim‑light. You’ll learn how edges and value ranges change mood. These fundamentals transfer directly to character and environment art.
Composition, Thumbnails, and Iteration
Make 6–9 thumbnails at 200–300 px height using just two values. When one reads well at a tiny size, expand it and add a third value. Digital boards make this process lightning fast—duplicate, nudge, and test framing without redrawing from scratch. When you’re ready to tackle bigger canvases, our digital drawing tablet guide will help you choose a device that’s comfortable for long sessions.
Maintenance & Nibs
Replace pen nibs when lines start to slip or the surface feels scratchy. Keep a microfiber cloth nearby to clear oils from glass. If your display feels too slick, a matte protector adds tooth and cuts glare, making pressure control easier.
Mindset Tips
Use constraints: a limited palette, a fixed canvas size, a two‑brush rule. Constraints are creative accelerants—they keep you moving. Save hurdles for later. Start small, finish often, and celebrate momentum.